Zobrazují se příspěvky se štítkemEnglish. Zobrazit všechny příspěvky

pondělí 27. února 2017

Display cabinet

The time has come to start another project, which should be next part of furniture set for our living room. First piece was TV stand that also can be found on this blog. All pieces should use the same overall design, similar carvings, colour etc.

Current project is a display cabinet. As usual I started with a Sketchup model.


I will use cherry again, carvings on legs and aprons will look as those on TV stand. Much more carvings and detail will be on upper crown. Overall height will be little bit over 2 metres and it will be 1.2metres wide and half meter deep.

I've already bought some lumber, rough milled some pieces, glued leg blanks and cut mortises and tennons.


Leg bottom parts are rough bandsawed and the same applies for apron pieces. Currently I'm working on carvings. I removed most of the wasted with handheld router and the rest must be done using carving chisels.


úterý 9. února 2016

Pastry board

My wife makes decorated gingerbreads (see her web http://pernicky-fiivi.webnode.cz/ ). And she asked me to make new pastry board for her. These boards are usually made from basswood but I've decided to use beech wood instead.

Some pictures of my wife's gingerbreads.


Making a pastry board is not complicated. Final dimensions are 55x60cm and main part is edge jointed pane. There are also breadboards on both sides, fixed with dowels. Front and back edge boards are screwed and holes are plugged.


I've personalized the board a little bit with inlay and wood burning. She's using violet flower as her "brand", so I made one from plumb veneer. You can see more in Youtube video. 


And here is a picture of finished board with some gingerbreads and rolling pin I've also made. That rolling pin enables my wife to make dough flat and exactly the thickness she needs.


Link to Youtube video.


sobota 9. ledna 2016

Oak cabinet - finished project

This is last article about this project and it is all about finishing.

To darken the wood I've chosen a method which uses amonia fumes. The amonia reacts with tanins contained in oak wood and produces nice dark colour. This is the reason why oak furniture which is several hundreds years old, has such a dark colour - there is tiny amount of amonia in the atmosphere and the wood reacts with it. But the amount is so small, it takes decades or even centuries. But if you place newly build oak furniture in a closed space with high concentration of amonia fumes, you can achieve the same result during several hours or days.

I've built small "tent" from wooden sticks and polyethylene sheet around my cabinet a placed a plastic bowl with amonia inside.

My amonia water was a little bit old and not so strong as new one, so it took two day to achieve a colour I was aiming for. Then I let it stay outside for a few days to get rid of the smell and placed two coats of Den Braven St. Croix. It is an oil based finish containing linseed oil, tung oil and some other ingredients.

Here are pictures of finished cabinet and also a Youtube video with building process.


čtvrtek 5. listopadu 2015

Small oak cabinet - part 2


Last time im ended my post with cabinet doors. I decided to use flat panels since I think they suit better. I only routed small radius with an edge on both outer and inner perimeter. But I did something different for outer edge - I ran the doors through verticaly instead of horizontaly, so the edge made by router bit is on the edge of the doors and not on the face as usual. The reason for this is because I plan to place the door a little bit proud of the front face of the cabinet. I played a little bit with scrap wood and came to this solution which gives it a very nice look.


Next I wanted to decorate corner posts with some flutes. I don't have any router bit suitable for this operation, so I made a scratch stock from old hand saw blade.  It makes flutes 8mm wide, I placed three of them on front face of the posts.


I glued up the carcass, in two steps. Both sides separately and then the whole carcass. Then I applied decorative moulding made on my router table. I glued the moulding and secured with brad nails.


Top board is glued and rough sanded. I played a little bit with scraps to find the edge profile which will suit it the best, but from all variants I like simple roundover the best. Next picture shows it right from the router, before sanding. (my cheap router bit isn't very good, it leaves some ridges I have to sand of)


And finally a picture of what I have so far. I still have to make the drawer (there is only a drawer front on the picture). And I have to turn small feet.


úterý 6. října 2015

Small oak cabinet


My wife asked me to build a cabinet to store some things from the kitchen which are not used so often and thus can be stored in the corridor next to the kitchen. She wanted a cabinet with a double door and one drawer above. Using Sketchup I designed this.


I'm going to use oak for this project and plan to darken it with amonia. Then I'll put an oil finish on it. All the construction will be made using frames and flat pannels, which is a litle bit of work but I like it very much.

Here is how the joinery will be done using mortises and tennons.


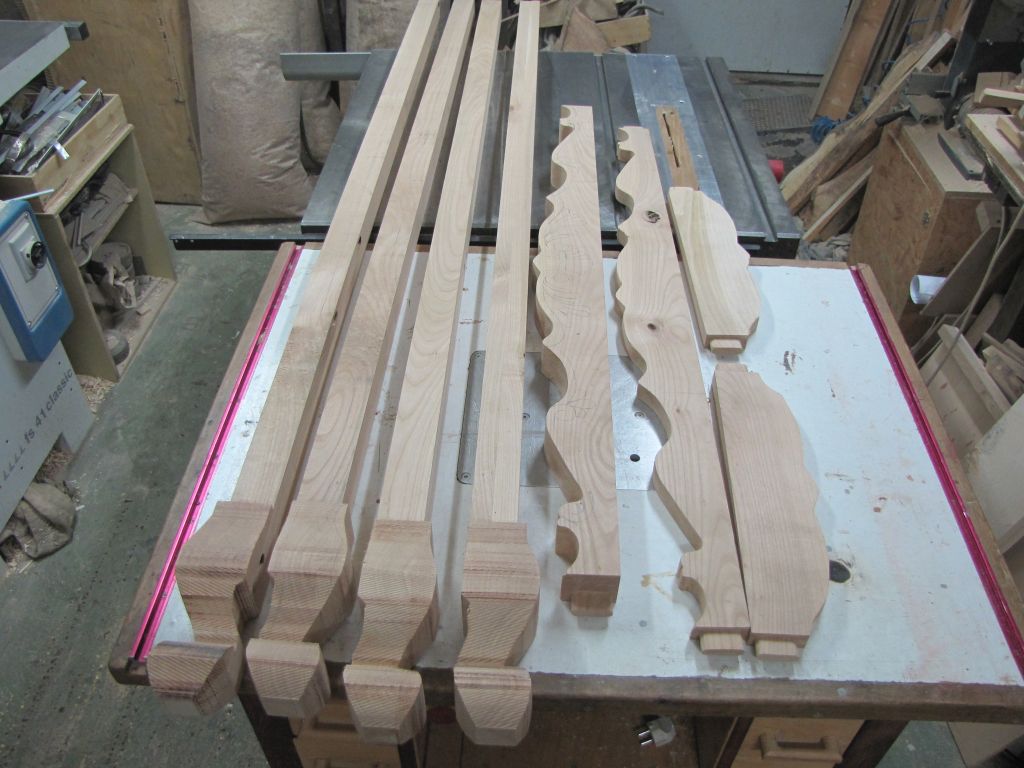
My boards bought on local saw mill are 33mm thick. This time I found some really nice and wide pieces, some of them was 60cm wide. I milled them to rough dimensions and let them sit in my shop for a few days. Then I glued four corner post from two layers of wood and milled them to 40x40mm.

Mortises and dadoes are cut using hand held router, tennons are cut on table saw and cleaned with rabbet plane and chisels. After I dry assembled cabinet sides, I realised, I should add small beading around the perimeter. But I couldn't simply route them since they wouldn't match in the corners. So I routed them on horizontal  rails only and for stiles I made them separately and glued them on.  


Cabinet back is usually made from plywood or MDF since it is not visible. But as I want to use amonia to darken the wood, I need all the parts to be made of the same wood. Plus I had lot of ofcuts laying around the shop, not suitable for visible parts of the cabinet, so I glued them together and made a frame.  The wood I buy is usually 33mm thick and when I need something less then 20mm, it would be a big waste of material to simply plane it down, turning some 13mm of wood to chips. So I'm resawing the boards and what's left after are board of thickness about 8-9mm, which can be glued together and planed easily to 6mm. And this is exactly what I did for back panel of my cabinet.

Dry assembly of back panel.


Doors are again simple mortise and tennon construction. Upper rail has a decorative curve on it which I cut on the bandsaw and using template routed to exact shape. I wanted the grain to follow that curve (not my idea, I've seen it on Youtube :-) ) so I tried to find some wood where the grain naturaly curves around some knot or other defect in wood. I think I have found such a pieces, but after finish I will see the result. 


Now I want to do some tests because I'm not sure what type of panels will suit the doors better - flat or raised. I'm inclined to use flat panels now.

pondělí 22. června 2015

Drážkovací hoblíky/Grooving planes

Dnes jsem si vyrobil tyto dva drážkovací hoblíky, podle článku z Fine Woodworking, na který jsem narazil na internetu. Jeden hoblík má tělo z buku, druhý z třešně, prostřední vrstva u obou je broskev, stejně jako klínek želízka. Želízko samotné jsem vybrousil ze starého nože z hoblovky, zatím mám hotové jen jedno, broušení jde velmi pomalu, protože jde o HSS ocel a nesmí se přehřát. Takže druhé želízko je zatím vybroušené jen z poloviny. Šířka želízka je 6mm a hloubka vytvořené drážky taky 6mm.

Today I made these two grooving planes, inspired by the article from Fine Woodworking magazine which I found on the Internet. I used beech for the sides of the first plane and cherry for the second one. The middle layer for both planes is made of peach wood and the same wood is used for wedges. Blade is ground from the old jointer knife, still working on the second one because I need to work slowly and not overheat the HSS steel. So the second blade is half way ground. Blade width is 6mm (1/4") and cutting depth is also 6mm (1/4").


neděle 26. dubna 2015

TV Stand/Entertainment centre - project completed

My last post about this project ended with some pictures of ornaments carving and today I can post pictures of completed project. It is already placed in our living room now.

Short summary at the end of this series.
Material si solid cherry, overall dimensions are aprox. 1,5m x 0,5m and height is 0,6m.  All decorations are hand carved, mostly right into the parts, except the ornaments on doors, which are carved separately and glued on.

Finish is water based dye made by Italian company Renner and two coats of 2K acrylic lacquer  Cloucryl Farbloss (this one is made in Germany).

This piece of furniture will serve as multimedia centre in our living room - as TV stand and place to store DVD recorder, hifi etc. (I have to remove that old silver coloured hifi and replace it with something more dark :-) )


pátek 13. února 2015

Chairs for children

A couple months ago I posted several articles about a writing desk for my son. We planned to buy a modern, metal chair on casters, but we had no luck at local stores. My son isn't very tall and he couldn't reach the floor with his legs, because minimum height of chairs was 36cm. I was thinking about making some box he can rest his legs on, but then I decided to build small wooden chair. And after he will grow a little bit, I can buy the bigger one on casters.
And because I have two children, I had to built two chairs at once.

I didn't need to buy wood for this project, because I had few pieces of beech at home. They were leftovers from my workbench built last summer.

Legs are 30 by 30mm square, the back ones are cut to shape on bandsaw a shaped to final shape on my router table using  template and straight bit with guide bearing. Curved back slats are cut on bandsaw and the cut was cleaned with hand plane on the outer side. Because I don't have a plane which is able to do the same for inner, concave side, I had to improvise. I used angle grinder with sandpaper disc, very carefully. And then sanded everything using flexible sanding strips.

Parts are joined with classical mortise and tenon joinery. I'm always doing mortises first, usually using a router. In this case, they are 8mm thisk. Tenons are cut on table saw and fitted with rabet plane.

The seat is slightly carved using angle grinder with sandpaper disc.

All edges are rounded to 3,2mm radius, except back slats, which have 6,3mm radius. Finish is the same dye as on writing desk and water based lacquer on top.

The seat height is 32cm a it is just the right height for my kids at this time.


středa 11. února 2015

Wall clock

I love period furniture and I also love old clocks. I was thinking about building some of them for quite a time. So I grabbed some scrap wood from previous project and inspired by Norm Abram video on Youtube I build simple wall clock.

I did not take pictures of complete build, I originaly even didn't think about posting this on the blog.

Material for the clock is mostly oak, except the back panel, which is pine plywood. Clock face is simply printed on my ink jet printer and glued to a piece of plywood. Clock works is cheap battery powered one.

For the finish I originaly planned to use dye and lacquer. But at the same time I spotted a thread on discussion forum "Cesta dřeva", where Petr presented his oak chairs that have been darkened with ammonia.  ( http://pekne-truhlarsvi.blogspot.cz/2015/01/dubove-zidle-s-patinou.html - the forum is in Czech language only ), So I build simple tent from sticks and polyethylene foil, bought a bottle of ammonia and gave it a try.
After 24 hours in ammonia fumes the result wasn't too convincing, the colour was dark, but with the shade of grey....but after I applied mix of linseed and tung oil, it turned much better. I absolutely love the way it turned out. I wanted to hang them in my shop, but I was convinced to place them in the kitchen :-)


úterý 6. ledna 2015

TV Stand/Entertainment centre

This project was put to a sleep for some time and during Christmas I've got back to do some work on it. I did a glue up and started working on doors. They are also made of cherry and will be glassed.


I managed to buy really nice hardware - hinges and knobs. Here I'm cutting mortises for the hinges, all by hand, using chisels.


Doors fitted.

I plan to decorate outer corners of the doors by some carving. I put a design on paper, scanned to my computer and printed several times. Then glued it on some offcuts - I had many of them :-) Outer shape is cut on the scroll saw, individual pieces are glued on a piece of wood using hot glue to hold them in place during carving. Now I can sharpen my carving chisels and get to work.